High-precision lapping is a superfinishing process capable of achieving extraordinary tolerances, including flatness to within one-millionth of an inch (0.000001″ or ~0.025 microns), surface finishes smoother than 1 micro-inch Ra (0.025 µm), and parallelism within 0.00005″ (1.27 µm). This level of precision is accomplished by using a loose abrasive slurry between a workpiece and a lapping plate, creating a uniform, stress-free material removal that refines geometry and finish beyond the capabilities of conventional grinding or machining.

Table of Contents
- Unlocking Ultimate Precision: What is High-Precision Lapping?
- The Numbers Game: A Breakdown of Achievable Lapping Tolerances
- How is Such Extreme Precision Possible? The Lapping Process Explained
- What Factors Influence Lapping Tolerances?
- Lapping vs. Other Finishing Processes: Why Choose Lapping?
- Which Industries Rely on High-Precision Lapping?
- Conclusion: The Unmatched Precision of Lapping
Unlocking Ultimate Precision: What is High-Precision Lapping?
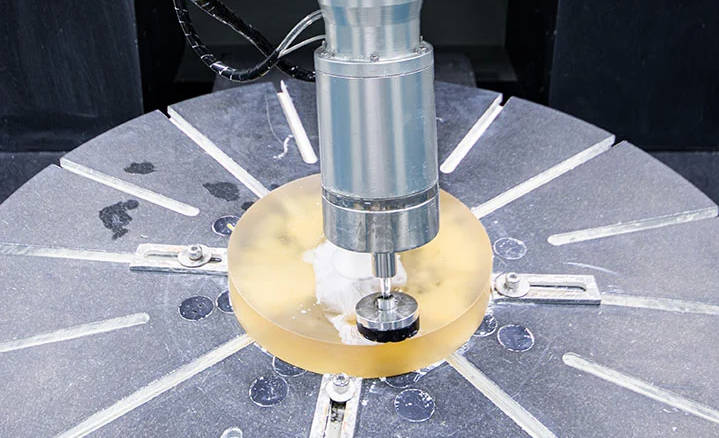
At its core, lapping is a precision machining process that employs a loose, abrasive slurry to remove minute amounts of material from a surface. Unlike grinding, which uses fixed abrasive wheels and can introduce stress and thermal damage, lapping is a gentle, low-speed, low-pressure process. The workpieces are held against a rotating, precision-flat lapping plate, and the abrasive particles in the slurry perform the cutting action. The magic of high-precision lapping lies in the random, non-repeating motion of these abrasive particles, which systematically abrades high spots on the workpiece surface until it perfectly conforms to the ultra-flat lapping plate. This technique is not primarily for bulk material removal but is the ultimate step for refining a part’s geometry to meet the most demanding specifications for flatness, parallelism, and surface finish.
The Numbers Game: A Breakdown of Achievable Lapping Tolerances
When engineers and designers specify lapping, they are pursuing a level of geometric perfection that other processes cannot reliably deliver. The tolerances are often expressed in microns (µm), micro-inches (µin), or even in terms of wavelengths of light (λ, lambda). Here’s a detailed look at what can be achieved.
Flatness: The Hallmark of Lapping Excellence
Flatness is arguably the most critical attribute achieved through lapping. It is the measure of how closely a surface conforms to a perfect geometric plane. In lapping, flatness is often measured using an optical flat and a monochromatic light source, where deviations from perfect flatness are observed as interference fringes (light bands). The tighter the specification, the fewer and straighter these bands must be.
With high-precision lapping, it’s possible to achieve flatness tolerances that are truly astonishing. Standard precision lapping can readily achieve flatness within 2-3 light bands (approximately 0.000023″ or 0.58 µm). However, by carefully controlling the process, high-precision lapping can consistently produce surfaces flat to within λ/10 or even λ/20 (one-twentieth of a wavelength of helium light), which translates to an incredible 0.000001″ or 0.03 µm. This level of flatness is essential for applications like fluid seals, optical mirrors, and semiconductor wafer substrates, where any microscopic gap can lead to failure.
Surface Finish (Ra): Creating Mirror-Like Surfaces
Surface finish, or roughness, is a measure of the fine-scale texture of a surface. It’s typically quantified as a Roughness Average (Ra). While a lapped surface may appear matte rather than bright and shiny like a polished one, it is often microscopically smoother and more uniform. This is because lapping removes the peaks and valleys left by prior machining operations, resulting in a non-directional, cross-hatched pattern.
A standard machined or ground surface might have a finish of 32-64 µin Ra. High-precision lapping can dramatically improve this, achieving a surface finish of less than 1 µin Ra (0.025 µm Ra). For materials like ceramics or hard crystals, it is possible to achieve finishes in the angstrom range. This ultra-smooth surface is critical for reducing friction and wear in moving parts, ensuring vacuum-tight seals, and providing a pristine substrate for optical coatings or semiconductor layers.
Parallelism: Ensuring Perfect Alignment
Parallelism is the tolerance that controls how parallel one surface is to an opposite surface. In “double-sided” lapping, where both sides of a part are processed simultaneously, exceptional parallelism can be achieved. This is because both sides are being abraded under the same conditions at the same time, ensuring a uniform material removal rate across the component.
High-precision lapping can hold parallelism tolerances to within 0.0001″ (2.5 µm) as a standard and can be pushed to 0.00005″ (1.27 µm) or better for critical applications. For thin, disc-shaped parts like silicon wafers or ceramic seals, parallelism is just as important as flatness to ensure proper function and uniform loading across the surface.
Dimensional and Thickness Control: Hitting the Exact Size
While lapping is a finishing process, it is also incredibly effective at achieving final dimensional thickness with extreme precision. Because the material removal rate is slow, predictable, and controllable, operators can “dial in” the final thickness of a part with remarkable accuracy. After an initial grinding or machining operation gets the part close to its final size, lapping is used to remove the final few thousandths or ten-thousandths of an inch.
With a well-controlled process, it is common to hold dimensional tolerances of ±0.0001″ (±2.5 µm). For high-volume, critical components, this can be refined even further to tolerances as tight as ±0.00005″ (±1.27 µm), ensuring part-to-part consistency that is essential for automated assembly and interchangeable components in high-tech devices.
| Tolerance Type | Standard Precision Lapping | High-Precision Lapping | Unit of Measure |
|---|---|---|---|
| Flatness | 2-3 Light Bands (~0.58 µm) | < λ/10 (~0.06 µm) | Light Bands (λ) / Microns (µm) |
| Surface Finish (Ra) | 2 – 4 µin | < 1 µin | Micro-inches (µin) / Microns (µm) |
| Parallelism | 0.0002″ (5 µm) | < 0.00005″ (1.27 µm) | Inches (“) / Microns (µm) |
| Dimensional (Thickness) | ±0.0002″ (±5 µm) | ±0.00005″ (±1.27 µm) | Inches (“) / Microns (µm) |
How is Such Extreme Precision Possible? The Lapping Process Explained
The remarkable precision of lapping stems from its fundamental principles. The process involves four key components working in concert:
- The Lapping Plate: A large, rotating disc made from a material like cast iron or ceramic. Its own surface is maintained to an extreme level of flatness, as it serves as the master reference for the parts being lapped.
- The Abrasive Slurry: A mixture of a liquid carrier (oil or water-based) and fine abrasive particles like diamond, aluminum oxide, or silicon carbide. The size of these particles is a primary factor in determining the material removal rate and final surface finish.
- Conditioning Rings: Large rings that rotate on the lapping plate. They serve a dual purpose: they constrain the workpieces and, more importantly, they continuously condition the lapping plate’s surface, ensuring it remains perfectly flat during operation.
- The Workpiece: The part to be finished. It is placed within the conditioning rings and moves in a planetary motion, tracing a random, non-repeating path across the lapping plate. This random motion prevents any single pattern from being worn into the part, ensuring that high spots are evenly removed until the entire surface is uniformly flat.
What Factors Influence Lapping Tolerances?
Achieving the tightest tolerances is not automatic; it requires expert control over numerous process variables. The final outcome is a delicate balance of science and operator experience. Understanding these factors is key to appreciating the complexity and expertise involved in high-precision lapping.
The Abrasive: Size, Type, and Concentration
The choice of abrasive is critical. Abrasive type depends on the material being lapped; for example, diamond is used for hard materials like sapphire and ceramics, while aluminum oxide is suitable for many steels. The abrasive size (grit) directly impacts both the removal rate and the final surface finish. A larger grit (e.g., 30 µm) is used for initial lapping to remove material faster, while a much finer grit (e.g., 1-3 µm) is used for the final finishing step to achieve a low Ra value. The concentration of the abrasive in the slurry also affects the cutting speed and finish.
The Lapping Plate: Material and Condition
The lapping plate is the foundation of the process. Its material—typically a soft, porous cast iron that can “charge” with abrasive particles—is chosen to work with the specific abrasive. The plate’s own flatness must be superior to the desired flatness of the workpiece. Therefore, the plate itself is constantly measured and reconditioned to maintain its geometric accuracy, often using the very conditioning rings that guide the parts.
Process Parameters: Pressure, Speed, and Time
The operator must carefully balance three key parameters. The pressure applied to the workpieces influences the material removal rate but too much pressure can cause warping or damage. The rotational speed of the lapping plate also affects the cutting rate. Finally, the time the parts spend on the machine is precisely controlled to achieve the target thickness and finish. Experienced operators can make micro-adjustments to these parameters throughout the cycle to optimize the results.
The Material Being Lapped: Hardness and Stability
The properties of the workpiece material itself play a significant role. Harder materials, like ceramics, will lap slower than softer materials like aluminum. Furthermore, the material’s internal stability is crucial. If a part contains residual stress from previous manufacturing steps, the lapping process can relieve this stress, causing the part to warp. This is why a stress-relieving heat treatment is often performed before final lapping.
Lapping vs. Other Finishing Processes: Why Choose Lapping?
Engineers have several options for finishing surfaces, but each has a distinct purpose. Lapping is chosen when geometric accuracy is the primary driver.
| Process | Primary Goal | Typical Flatness | Typical Surface Finish (Ra) |
|---|---|---|---|
| Grinding | Rapid material removal, shaping | Good (~0.0005″) | Fair (16-32 µin) |
| Lapping | Extreme flatness and parallelism, controlled finish | Exceptional (<0.00001″) | Excellent (<1-4 µin) |
| Polishing | Creating a bright, specular, mirror-like finish | Can degrade flatness if not controlled | Exceptional (<1 µin, specular) |
You choose grinding for shaping and significant stock removal. You choose polishing when the primary goal is a bright, reflective, and low-scatter surface, often at the expense of absolute flatness. You choose lapping when the most critical requirement is world-class flatness, parallelism, and a functionally smooth surface, especially for sealing surfaces or mating components where geometric form is paramount.
Which Industries Rely on High-Precision Lapping?
The demand for the extreme tolerances achieved by lapping comes from the world’s most technologically advanced sectors, where even microscopic imperfections can have major consequences.
Optics and Photonics
Lapping is used to create the ultra-flat surfaces required for laser mirrors, optical filters, and prisms. The flatness of these components is critical to prevent distortion of the light waves passing through or reflecting off them.
Semiconductor Manufacturing
Silicon and other semiconductor wafers must be exceptionally flat and parallel to ensure the successful photolithography process, where circuits are printed onto the wafer. Lapping provides the pristine, uniform surface necessary for achieving high yields of functional microchips.
Aerospace and Defense
Components like mechanical seals in hydraulic systems, fuel injectors, and parts for gyroscopic guidance systems rely on lapped surfaces to function reliably under extreme pressures and temperatures. A perfectly flat seal prevents leaks that could be catastrophic.
Medical Devices
Surgical tools and implants often require lapped surfaces to ensure biocompatibility and proper function. For example, components in artificial heart valves or hip implants are lapped to reduce wear and ensure longevity inside the human body.
Conclusion: The Unmatched Precision of Lapping
High-precision lapping stands apart as a finishing process dedicated to achieving the pinnacle of geometric accuracy. It is the definitive solution when standard machining and grinding fall short. By leveraging the simple yet elegant principle of controlled abrasion with a loose slurry, lapping delivers sub-micron tolerances in flatness, parallelism, and dimensional control, along with superior, uniform surface finishes. While it may not be the fastest process, its ability to produce virtually perfect geometric forms makes it an indispensable technology for the critical components that power our modern world—from the microchips in our phones to the optical systems exploring the cosmos.
high-precision lapping, lapping tolerances, lapping process, flatness tolerance, surface finish lapping, parallelism tolerance lapping, what is lapping, lapping applications, lapping vs polishing, lapping vs grinding


